Summer has been awesome, but lately I’ve had daydreams of floating over the turning leaves come fall. Hot air balloons are the best form of air travel!
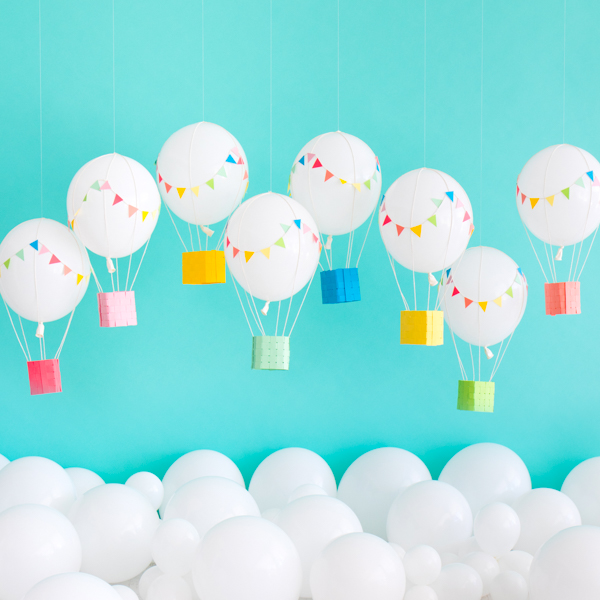
This hot air balloon DIY would make a sweet centerpiece for a birthday or bon voyage celebration! Scatter a few small balloons across the center of your tablescape to emulate fluffy white clouds. You could even make it a theme with this photobooth from the archives! Up, up, and away!


Materials needed: Cardstock (in rainbow colors), x-acto knife, ruler, scissors, twine, 3m small wire hooks, low temp hot glue gun, white thread, 12” balloons (in white)
Step 1: Cut cardstock into ½” by 11” strips with an x-acto knife and ruler. Lay 5 strips together horizontally, then hot glue a strip on top of the beginning, middle, and end of the pieces. Trim the cardstock so the 3 support strips are flush with the height.
Step 2: Hot glue the ends of the cardstock piece together to form a loop. Slightly crease the edges to make the shape more rectangular.
Step 3: Cut a bunch of cardstock strips ½” by 2-½”. Weave the strips over and under the strips until you have a basket.
Step 4: Measure and cut 3 pieces of twine that are 33” long. Find the midpoint of the strands and hot glue them together in an asterisk-like shape. Inflate and knot a 12” balloon, and drape the strings over the top of the balloon.
Step 5: Knot thread around the center of the twine. Then, hot glue the centerpoint of the twine to the top of the balloon. Let glue cool completely.
Step 6: Install a 3m hook onto the ceiling. Then, tie the end of the thread the hook.
Step 7: Evenly space out the 6 strands of twine around the balloon and attach the ends to the basket with hot glue. You’re nearly finished!
Step 8: Make mini bunting for the balloons by cutting cardstock into long strips 1” tall. Stack a few strips and cut diagonally to make a bunch of 1” wide triangles. Hot glue triangles to twine leaving a bit of space between each.
Step 9: Hot glue the bunting in scallops along the balloon’s vertical twine. Trim off any excess and you’re done!


Photography & styling by Naomi Julia Satake
Crafting by Justine Pon
SHOP THIS POST: Jumpsuit, Cloud Plates, Stripe Napkins, Cutlery, Cupcake Liners